Saturday, 23 April 2011

Look What I Found

Whilst visiting one of my customers last week I came upon a rather sad looking tea urn that had failed its PAT test due to a nick in the cable. The care home I was visiting were going to chuck it out so for a small donation to the residents fund I had a 27L boiler I could turn into a copper.


Luckily the nick in the cable was near the end so it wasn't a tough job to pull the cable through into the housing, cut it, and re connect it. Having done that it was a pretty simple job to replace the tap assembly with a tank connector and ball valve.


I also had some 15mm compression fittings to push fit 90 degree adapters so I used those. I had been thinking about utilising a hop sack instead of a hop stopper but after some good advice from those at The Home Brew Forum I bored out the tank connector with a dremel so that the hop stopper could be accepted and connected it through the tank connector and onto the ball valve. I'm sorry but I forgot to take a pic of this.


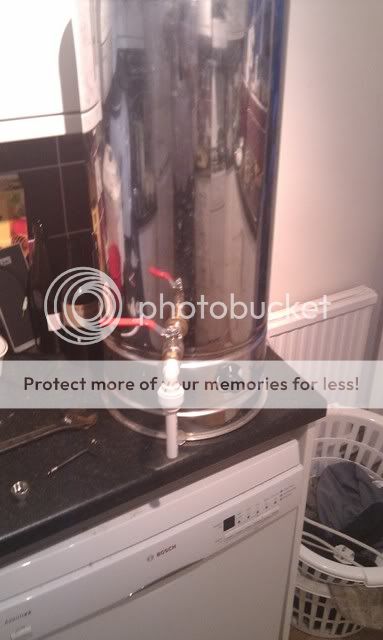
Then it was simply a matter of drilling rows of 2mm holes in the underside of the stopper, tightening everything up and giving it a boil test. With its 3kW element I'm pleased to say that it passed with flying colours so it is just a matter of doing a brew with it tomorrow to see how we get on. 


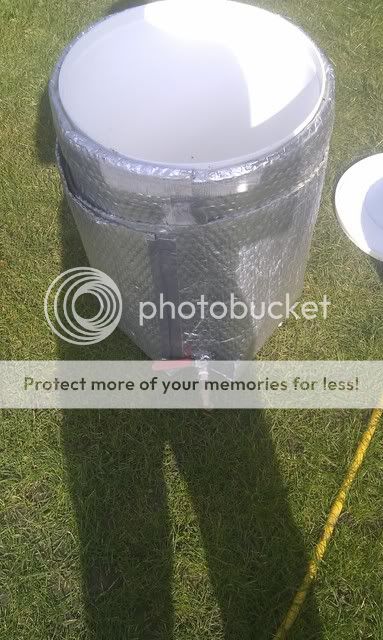
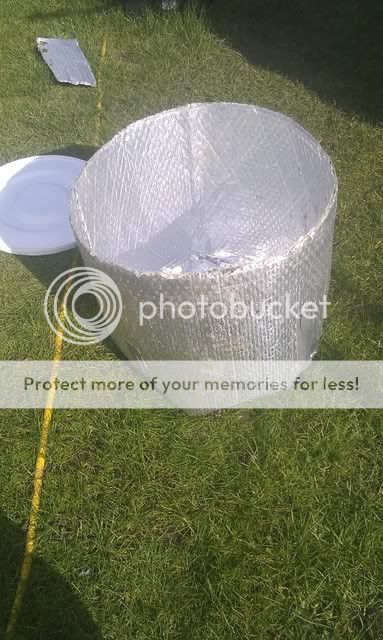
I've given the inside a bit of a clean but haven't bothered with the outside because I plan to wrap some insulation around it.


Saturday, 12 March 2011

Increasing The Insulation of my Mash Tun

I finally got round to using that roll of insulated bubble wrap that Eddie gave me to make my mash tun. Isn't it amazing what you can do with a roll of gaffer tape. I realise modern (American) parlance refers to it as duck tape but when I used to play guitar in a band it was always called gaffer tape. If it was really good gaffer tape you could usually tape the drummer to the wall, but I digress...... 


The roll of insulation, MT on its side and the "hat"
As things stand my mash tun is simply insulated by a double skin of bubble wrap and a blanket but I was losing a couple of degrees an hour so definitely time for an upgrade. 


I started off by rolling the mash tun on its side and rolling the insulation around it, leaving about four or five inches overlapping the bottom and making a cut out for the tap.


Then I turned it upside down and folded the insulation over the bottom before taping that down. Then I got the lid of the mash tun, put it on and made the "hat" in much the same way. 


So now I've got double the amount of insulation that I had before and hopefully much more stable mash temperatures. Of course, if I was in any way organised I'd have done this before the onset of winter and not after but that's me I'm afraid.


Incidentally today's recipe has been inspired by Mark Dredg's "Regular Beer" post on his blog, Pencil and Spoon; if you're a beer lover or even if you're not, I'd definitely recommend giving it a read.


Reading the blog made me realise that the beers I currently have on tap are a little on the insane side; a 7% APA (Whispering Bob), a Belgian Dubbel and a Smoked Porter. Add to that the two parti gyle brews I made last week and you'll see why I wanted something a little more "regular".


So in this one we've got 4.5kg of Maris Otter, and 250g each of Caramunich and Wheat Malt which will be bittered with a combination of Challenger and First Gold before a generous late hopping of Fuggles and East Kent Goldings which I got quite cheaply from Easy Home Brew. I'm also using a combination of SO4 and Nottingham yeast - just for the hell of it.


Well the good news was that I only lost 0.5C in the hour long mash, still not perfect but a considerable improvement. I think the remaining heat loss may be coming from the metal tap and metal strainer and I'm not quite sure what I'm going to do to stop that. 


For the record, the rest of the brew went pretty well and I was all cleaned up before dark which was excellent news. The brew came out at 1042 so should come out at around 4.5% if it ferments out around 1008.

Saturday, 26 February 2011

First Attempt at Parti-Gyle Brewing

I've been thinking about parti-gyle brewing for some time now; it may be the first time I've done it but it is an age old principle where a strong beer is made from the first runnings and then a small beer is made by adding some further grain (a process known as "capping the mash").


It meant a bit of juggling with my Beer Smith recipe software; I ended up doing three recipes, a double cornie length brew to get the right grain bill and then two 19 length brews to get the right levels of bitterness. The base was mainly Maris Otter with some aromatic malt, carapils and caramunich. The total grain bill came to 10kg, 1.5 of which was kept back to cap the mash.


The first beer ended up being a slightly less bitter version of Whispering Bob with T-58 yeast instead of the usual US-05. Of course it came out a bit stronger than I originally thought with an OG of 1072. If it ferments out as low as it usually does, that'll end up being around 8.5% abv.


Guessing that the small beer would mean fewer bittering hops would be required, I reduced the bittering hops, a Sorachi/Citra combo but was slightly surprised to find a pre boil gravity of 1034 turned into a post boil one of 1048.


The whole process took a couple of hours longer than a normal brew, although having a separate HLT and a 10 gallon boiler and mash tun certainly helped, It is certainly something I'll be doing again.


Grain Schedule


8260g Maris Otter Pale Malt
620g Aromatic Malt
620g Cara-Pils
550g Caramunich


Total grist weight 10050g


Hold back 15% for small beer, 1500g.


Strong Beer - Hop Schedule


31g Centennial 10%AA (FWH, 90 mins)
27g Amarillo 8.5%AA (FWH, 90 mins)


9g Simcoe 13%AA (Boil 30 mins)
9g Cascade 7.6%AA (Boil 30 mins)


22.5g Simcoe (Flame out)
22.5g Cascade (Flame out)


Yeast Safbrew T-58
Protofloc 5 mins from end of boil.


OG 1072
Estimated ABV 8.5%
Estimated IBU 74


Small Beer - Hop Schedule


18g Citra 13.8%AA (FWH, 60 mins)
18g Sorachi 12.2%AA (FWH, 60 mins)


10g Citra (30 min)
10g Sorachi (30 min)


25g Citra (Flame Out)
25g Sorachi (Flame Out)


Yeast US-05
Protofloc tablet 5 mins from end of boil.


OG 1048
Estimated ABV 5.5%
Estimated IBU 74


Sunday, 20 February 2011

Beer Porn - Whispering Bob Mark 3

Obviously there's no way I should be drinking this yet but the last lot ran out today and I just had to test it. It needs to be in the keg to develop for a couple of weeks and it should be absolutely killer by then.


I'll be getting the next batch on next weekend; I think I am going to try the same recipe with a little candi sugar and T-58 yeast and Belgianise it a bit. 

Monday, 14 February 2011

Beer Porn - Starvation Point Porter

I'm pretty pleased with this although I'm not sure I'll brew to this recipe again. The smokiness isn't too much but the beer is a little thinner than I'd like. If I were to brew this one again I think I would find a way to thicken the beer up a little and perhaps dry hop with some Fuggles. I like the First Gold and EKG combo but I think a porter needs Fuggles. 

Saturday, 5 February 2011

A Quick Thank You

Mother always brought me up to thank people who have done nice things for me and my friends so a big thank you to Andrew Morgan of Bottle Shop and to Nicky Fieldwick of Easy Home Brew for supporting the inaugural East Kent Amateur Brewers.


Andrew's love for beer is well known and we're all thrilled to see Bottle Shop enjoying the success it so clearly deserves. As well as organising and hosting the monthly event (first Wednesday of the month) Andrew has registered a domain name for the society as well. 


Nicky has also weighed in with a significant discount voucher for members which can be used either in store or online. So thanks so much to you both. It was a small beginning but I feel it will soon grow.

Saturday, 29 January 2011

My New Toy - A Wort Pump

One of the bigger pains in the bottom I've had to put up with recently is having to pick up a five gallon fermenter and pour the contents into my copper ready for boiling. Add to that, my set up is a a 10 gallon one and moving full containers that big is a bit of a non starter, especially for one with such a history of back problems.


Lugging 46L of wort is no fun
With there being a distinct lack of height in my shed I realised pretty early on that a gravity fed system was going to be a non starter so a pump was a must buy. My first attempt at using a wort pump was not exactly an unqualified success; I used a pump designed for transferring water around solar heating systems. As the pump was not self priming I had to suck the wort from the fermenter in the first instance. As a result I can exclusively reveal hot wort isn't the most comfortable thing in one's mouth. 


Having braved the blisters in my mouth I was then faced with the pipework coming out of the fermenter and spilling wort all over my shoes and jeans. To cap it all, the whole thing packed up after three brews. 


Having parted with the best part of £60 (that's a lot of drinking vouchers, folks) I was understandably reticent to put my hand in my pocket again. Luckily the brewing community is a broad church and full of such generous folk. James from Sandstone brewery suggested a flojet pump, his Epicness Kelly Ryan then linked me to the instructions and Pete Brissenden from Lovibonds saved me from having to fork out upwards of £100 for a compressor. How? Read on.


Flojet pump and pressure spray
The flojet pump in question runs on compressed air. It's also self priming so no more sucking (matron) and can be run from a compressor or via a bottle of compressed gas. I've got dispense gas for my bar but lugging it down to the shed was impractical, and you need to have adequate venting. I was all set to break out the credit card at toolstation when Pete suggested using a pressure spray, the type of thing you can get from B&Q. 


That rang a bell with me and following a short rummage in my loft I found a pressure spray (used for treating carpets in care homes for urine spills - don't laugh that'll be us one day) when the pressure relief valve had failed. I'd kept it for spares. All I then needed to get was a 1/2"BSP female to 3/8" JG pushfit and the job, as they say, is a good 'un.


Pumping water from lower FV to upper.
So, after some testing in the conservatory, all was working. I'd half filled the pressure spray with water to lessen the amount of pumping I needed to do.

So how did it perform? Pretty well and much better than anything I've used before if I'm honest. As well as pumping from a fermenting vessel to the copper, it also did a great job recirculating wort back into the mash tun. Fantastic.


I'll be honest, I did two brews today and I was a bit knackered with all that pumping so I enlisted the help of one my teenaged sons, made a few jokes about masturbation and low and behold my wort was in my copper. Another good thing about the pump is that it can be wall mounted so, going forward, there'll be more room. However, best of all I'll now be able to do double brewlengths the whole reason I invested in a 10 Gal set up.