Wednesday 29 December 2010

Temperature Conundrum

I've tried rewriting this post a few times now, and I can't get it to sound any less geeky. So I'm just gonna embrace my inner geek and roll with it.

I was having a particularly testing brewday today, due mainly to my failing to get an early start because of the cricket in Australia (I've been up nights for the last three or four days and today the body said no more).

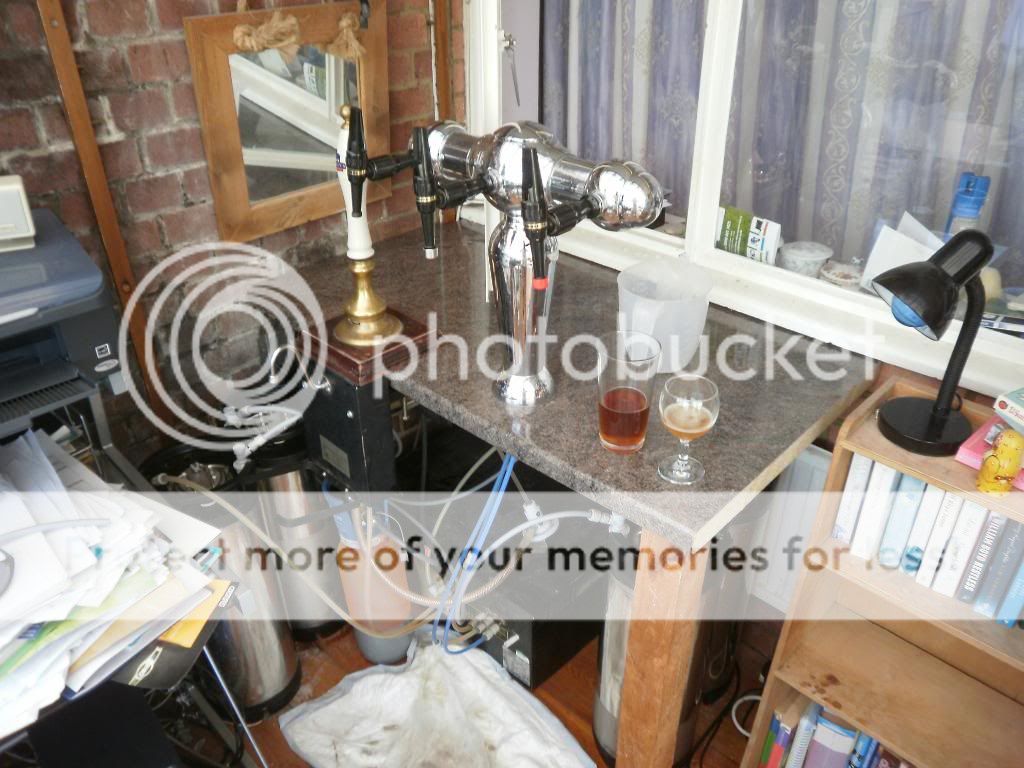
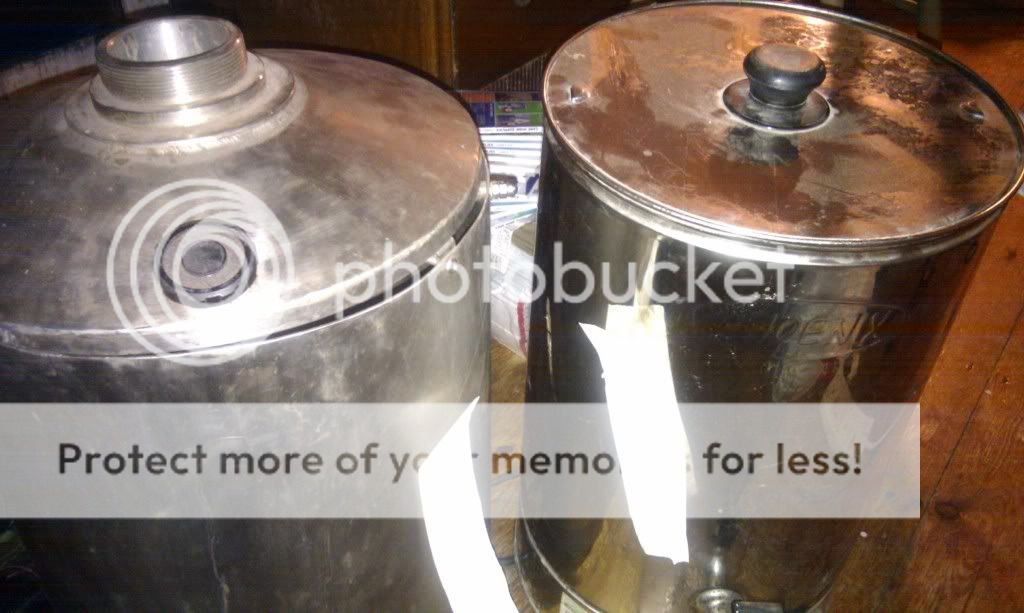
This was my first brew with my new HLT and sparge arm and it worked flawlessly, which is more than I can say for the mash tun. I really ought to service my brew plant after every few brews because, whilst sparging, the ball valve to my mash tun fell off. Luckily I managed to push it back on and didn't lose too much wort but my worst nightmare came after darkness had fallen.

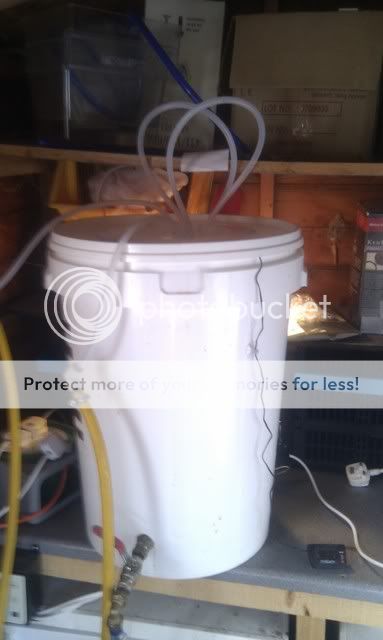
Given the fail in my mash tun, I chose to test my chillers. I have three 10mm bore stainless steel chillers plumbed in series. I ran some water through them which duly pissed out at the JG fittings. I looked and saw that I'd lost one of the little black washers so I had to replumb and got down to two chillers until I can get some more 10mm JG fittings.

Having established the watertightness of my immersion chillers I then set about chilling my wort. For the second or third time, I've been using an aquarium thermometer to measure the temperature drop with the probe dangling in the wort. Today it was dangling near the bottom of the copper, and reading 10C lower than the wort at the top. I wondered how this could be, and then I checked the chillers. The coils finish about 5-7cm from the top of the wort for one thing, and then the cold water is fed into the bottom of the first chiller.

I'm guessing that the heat exchange only works at the bottom of the wort, which has led me to consider whether I might plumb my two chillers in parallel with the cold water feed going from the bottom in one and the top in the other. I wonder if this will lead to more efficient cooling?

Thursday 23 December 2010

Converting a "Burco" style boiler to a Hot Liquor Tank

As I may have bored you about recently, I picked up a 25L tea urn type boiler a couple of weeks ago for next to nothing (did I tell you I only paid a fiver) and today I set about converting it into a Hot Liquor Tank (HLT).


First of all, why would you want a separate HLT and Copper? Many brewers quite happily manage without as did I until I realised how much more convenient it was to have the copper bringing the wort to the boil at the same time as I was finishing off the sparging.


So, without further ado, take your boiler, descale and clean it if it is a second hand like mine was then remove the tap. Actually, if you don't want to remove the tap it wil stiff function perfectly well but I want to fly sparge, again to save hassle and time so I've made the conversion.


You will need

  • a length of 15mm copper pipe
  • a 15mm compression fit ball valve
  • two 15mm compression fit end caps
  • a 15mm tank connector
  • 90 degree elbow
  • 15mm speed fit t-piece
  • PTFE tape

Tools

  • 2 x adjustable wrenches
  • pipe cutter
  • scissors
  • drill & drill bits

You could use a compression fitting T piece but, as I need to remove and attach the sparge arm frequently, I've opted for the speed fit option.


First thing to do is to place the tank connector into the void left by the removal of the old tap. Try to get it as central as possible to avoid potential leakage.


Seat the tank connector into the aperture vacated by the old tap.

Once the tank connector is in place, assemble the ball valve and 90 degree angle with the three bits of pipe required to connect them together. While putting these together get then roughly in position and trim the pipe afterwards if required.

The first part of the tap configuration


Once I'm happy with the alignment, I dismantle and reapply piece by piece with PTFE tape. It is important to apply the tape in the opposite direction to the travel of the nut to ensure a good seal. The finished assembly should look like this.

The finished assembly.

When you've completed that, it is time to test it for watertightness under pressure. For this it is important to fill the vessel as full as you can and then put it on to boil. If you see any leaks - note from where, drain down and reseat where necessary.


While the water is coming to temperature, you can start on the sparge arm. You don't have to use a T-piece, you could just as easily use another 90 degree bend but I've chosen this method. All I did here is cut the remaining pipe in half and fit the endcaps to the speedfit tee. To end up with this.

Sparge arm, ready for drilling

Tomorrow I shall be drilling in on each side of the tubing (i.e. 90 degrees each side of the upright part of the tee) so the water will exit both sides of the sparge arm. Hopefully I will be able to test this sooner rather than later, on a brew between Christmas and the New Year.

Monday 20 December 2010

What's On the Bar this Christmas


I filled the Cornie with some Irish Extra Stout this evening, and realised that I've now got three of them on at once which must rank as pretty bad planning.

I'm sitting here trying to decide which three to connect up to the T-bar and which one to put on the beer engine. Will one particular style lend itself to hand pull and does it really matter if they are all in kegs anyhow?

Anyhoo, I've got one beer connected to the T-bar at the moment and that's the Oatmeal Stout which must be due to finish soon. The full list is as follows.

Cornie 1 - St Petersburg Imperial Stout
Cornie 2 - Oatmeal Stout
Cornie 3 - Belgian Dubbel Bubble
Cornie 4 - Whispering Bob American IPA
Cornie 5 - Sanitiser (in Preparation for Irish Extra Stout)
Cornie 6 - Beer line cleaner.

So, if there's any consensus on what goes better where - I'd be pleased to hear it. And, no, I'm not going to be drinking beer line cleaner any time soon.

Going to be brewing between Christmas and the New Year and I'm trying to decide what to make. I really want to brew a Black IPA but I'm conscious that I've brewed loads of dark 'uns lately so might go for a simple Tony Christie Pale Ale but I'm open to suggestions so do fire away.


Christmas Brewery Modifications


Delighted to report that I've been able to source a cheap hot liquor tank (HLT) for the brewery which should speed up some of the processes and enable me to start fly sparging.

However, due to the lack of headspace in the shed, I'm going to have to invest in a pump to send the wort from the mash tun (via a collecting vessel) to the copper. I've used a pump before but, frankly, it wasn't man enough to do the job and failed after three brews. So I've gone for a FloJet pump, a bit like one of these which will be operated by a compressor. As long as the compressor has a regulator on it, I should be able to control the flow just as I want it.

Work has been pretty bonkers the last few weeks and the weather hasn't exactly helped so I'm hoping to spend plenty of time in the shed over the festive period. For a guy who is pretty awful at DIY, building the brewery has been strangely therapeutic most of the time. The biggest challenge has been getting everything watertight but the joy of achievement far outweighs the frustration of leaks.

I approached the conversion to all grain brewing with some trepidation but, with 20 brews under my belt, I now realise it was the only way forward if you really want to brew "your own" beer. I hope that readers of this blog realise how easy it is to brew in this fashion; in the new year I hope to conduct some all grain demonstrations at Easy Home Brew in Ashford. Stay tuned for more updates.

Saturday 6 November 2010

Moonlighting

Just a quick bit of shameless self promotion; I'm going to be doing the first of my brewing demonstrations at Easy Home Brew in Ashford. Nicky and Matt bought the business earlier in the year and, following a website re-brand, they're now stocking a not insignificant selection of homebrew essentials.

As well as the usual hardware, chemicals and kits for wine and beer, they also have a small selection of grains, hops and yeasts suitable for kit tweakers and all grain brewers alike.

I'm booked in to do two demonstrations before Christmas; today Saturday 6th November and again in a fortnight Saturday 20th November. Both sessions start at 2pm and will feature basic kit brewing techniques followed by a Q&A session.

Monday 1 November 2010

Latest Boiler Mod


Thanks to some excellent advice from my good friend Jim The Brewer of Brentwood Brewing Co, I've now modified my boiler to make sure the hop oils from the late additions are not vented off.

All I've done really is to drill six 10mm holes so that the 3/8" hose that connects my triple stainless steel immersion chillers can remain in the boiler while the lid is put on.

A slightly surprising by product of the lid is the decreased cooling time. This time my wort cooled from 95c to 72c in 8 minutes. At this time I turned the chillers off, added the steep hops and popped the lid on for 10 mins before putting cooling down to 35c in a total of 40 minutes.

The temperature of the water exiting the chillers was upped from 50c to 58c. Of course the real test will be how hoppy this beer - an American IPA - turns out to be.


Friday 22 October 2010

Whispering Bob - The Recipe


I was listening to the BBC Radio Four Today programme some months ago on the occasion of Bob Harris' 40 years in broadcasting. They played an audio clip (they tend to do that on radio programmes) in Bob's trademark whisper: "kick back, open a bottle of pale ale and listen to this."

Now it's fair to assume that, when the legendary broadcaster originally uttered that phrase, this isn't the kind of pale ale to which he would have referred. If it were around at all, the American craft brew scene surely hadn't evolved to the level it has now at the time Bob was cutting his teeth on The Old Grey Whistle Test.

Yet, US style craft beer and Whispering Bob have so much in common; they're both born of geeky innocence, bursting enthusiasm and a genuine love of their fellow musician/brewer. By being at the cutting edge of their respective fields and unafraid to push the boundaries, they have won the loyalty and respect of their fans.

So this is what I'll be brewing tomorrow and I hope it is a fitting tribute to a highly respected broadcaster.

6.00 kg Pale Malt, Maris Otter (5.9 EBC) Grain
0.40 kg Aromatic Malt (51.2 EBC) Grain
0.40 kg Cara-Pils/Dextrine (3.9 EBC) Grain
0.25 kg Caramunich Malt (110.3 EBC) Grain
0.25 kg Pale Crystal Malt (55.0 EBC) Grain

Bittering Hops
30.00 gm Chinook [11.40 %] (90 min) (First Wort Hop)
30.00 gm Amarillo Gold [8.50 %] (90 min) (First Wort Hop)

Flavour Hops
30 min 10.00 gm Simcoe [13.00 %] (30 min) Hops
15 min 10.00 gm Cascade [7.60 %] (15 min) Hops
5 min 1.00 items Protofloc (Boil 5.0 min) Misc

Late hops
25.00 gm Cascade [7.60 %] (0 min) (Aroma Hop-Steep)
25.00 gm Simcoe [13.00 %] (0 min) (Aroma Hop-Steep)

Yeast US-05

Estimated OG 1069
Bitterness 70.6 IBU
Colour 21.5 EBC
Estimated ABV 6.45-7%

OK it is more San Diego than Nashville and it might take me a few goes to get it right but it feels like I am on the right track.


Monday 18 October 2010

Back to Kit Brewing - Briefly


On the homebrewing forum I am a member of, it is often said by the All Grain brewing community that, once you've tried All Grain beer, you'll never go back to kits.

Well, that's not strictly true in my case. As I've said before, All Grain brewing makes excellent beer but it can take hours to do whereas a kit can be knocked up ready to ferment in 30-45 minutes.

It has been more than six months since I last brewed a kit but I am booked to demonstrate the principles of kit brewing at a local homebrew shop, so I wanted to give myself a quick refresher. This kit is an out of date brewbuddy kit which I've brewed with a pack of Windsor yeast, a kilo of beer kit enhancer (50/50 spraymalt and brewing sugar) and a hopped tea made up of Simcoe and Cascade hops.

Adding hopped teas and changing the yeast is referred to as kit tweaking. In order for the yeast to do its best, it meeds to have lots of sugar and oxygen to feed on so one of the other important things to do in kit brewing is to get as much air into the wort as possible. This can be achieved by letting the water drop from a great height or by thrashing with a beer paddle.

The thing is, I'm quite lazy and I've found that, by using a hand blender, you can whip loads of air into the wort. It is worth noting that in the 48 hours since I placed the fermenter into the brew fridge, the wort has fermented down from 1055 to 1012, which is pretty cool.


The reason I've gone for the Simcoe and Cascade hop combo is that I'm beginning to love the West Coast style. I'll be putting a Cascade/Simcoe all grain recipe together pretty soon and it will be nice to see how they effect the Brewbuddy kits. I find, if you have a number of identical kits which you brew with identical yeasts, it gives you a decent test bed for testing hop additions. Of course the only problem with kit beer is that it takes about 5-6 weeks to be ready to drink. Still I've given myself the refresher course I needed and now I'll be ready for my demonstrations in a few weeks' time.

Sunday 10 October 2010

Dark Beer Time


I don't quite know what it is about the darkening days but it makes me think of a warming fire and a strong dark beer full of chocolate malt and roasted barley. I've got two such beers fermenting away; a dark porter called Dogbolter made from a recipe from Ramsgate Brewery and an Imperial Stout called St Petersburg which is brewed by Thornbridge.

The Dogbolter, on the right of the picture, needs to be racked today or tomorrow and has fermented down to 1009 giving me a 6% abv. I've got 20g of Kentish Fuggles sitting in a sterilised stocking. It will add a resinous grassiness to the beer.

On the left of the picture is the St Petersburg. Although it fell four points short of the OG at 1068, it has fermented out to 1010 so far, giving an ABV of 7.6, just under the commercial version.

The next brew on the horizon is another stout, this time an oatmeal variety. I'm not entirely sure why I've got all these dark beers on the go at once, it must be the impending wintertime but I'm sure looking forward to drinking them.

Wednesday 1 September 2010

My Competition Red Ale Recipe

So here I am, sitting in a converted French school house listening to Planet Rock, drinking Jentain Ambre and dreaming up recipes for my Brew It Yourself competition Red Ale. It's all good.

Not knowing an awful lot about red ale; all I've got to go on is the Beer Smith's definition of Red Ale and the competition guidelines which state the beer must be:

A dry-hopped red ale between 4.8% & 5.5% ABV

Beer Smith's definition of Red Ale:

Style OG 1.044 -1.060
Style FG 1.010 -1.016
Style EBC 17.7-35.5 EBC
Style IBU 17.0-28.0 IBU

I've recently taken delivery of a small amount of Sorachi hops, and I like to try my first beer as a single hop beer because I like to get a full sense of the hop flavour. Well it makes sense to me anyway.

Anyway, here is the first draft of the recipe.

Brewlength 23L
Est OG 1.054
Est Colour 32.5 EBC
Est IBU 27 IBU

Grain Bill
Maris Otter 5.9 EBC 4800g (87%)
Carared 39.4 EBC 390g (7%)
Amber Malt 43.3 EBC 112g (2%)
Torrefied Wheat 3.3 EBC 112g (2%)
Chocolate Malt 689 EBC 55g (1%)
Black Malt 55g 985 EBC (1%)

Hop Schedule

20g Sorachi (12.2%AA) FWH
30g Sorachi @ Flame Out
20g Sorachi Dry Hop (3 Days)

Protofloc at 5 mins. In terms of yeast I can use US-05, S-04, Windsor or Nottingham. I haven't made any decisions on that yet.


Tuesday 24 August 2010

Is this the answer to sediment in the bottle?

Sediment in home brewed beer has been an issue for donkeys years. As I'm sure most of you know, it is by product of secondary fermentation and cannot easily be avoided. Until now perhaps. A product called Brodies, widely used in Australia, comprises a sediment trap and bottle cap.

They're reuseable and allow the bottle to stand upside down, therefore collecting all the sediment. You can then remove the trap, leave the cap in the bottle and store your home brewed beer on its side in the fridge or drink it straight from the bottle.

I can tell you more about these but there is an excellent instructional video by an independent home brewer in the US available here which explains things much better.

I could do with trying some of these but the company who makes them is still looking for a UK distributor. So I thought, how about a bit of blog/twitter market research. Home brewers, can you tell me if you think they are a viable option.

Would you buy these so you could either drink homebrew from the bottle or lay it down in the fridge?

Do you prefer sediment in the bottle?

Bearing in mind they are reuseable, spares are available and obviate the need to use crown caps, would you pay,

a: £1 each for these
b: £2 each for these

Or do you think the price differential from using conventional crown caps outweighs the benefits?

Leave a message below. I'm interested to hear what the UK home brewing community has to say.


Saturday 21 August 2010

So Many Brews.... So Little Time

I've been going into brew overload this last week deciding what sort of beers to brew next, and next, and next. There are so many I want to do and no free weekends until I return from holiday.

I've got a Red ale for the October Brew it Yourself competition, two Thornbridge recipes I want to do (a Jaipur and a St Petersburg Imperial Stout), Sierra Nevada Pale Ale as well as mark two versions of my Summertime Pale (which I have christened Whispering Bob in tribute to the legend who has just celebrated his 40th year in broadcasting) and my Green Bullet Pale Ale which will be tasted at Beervana in Wellington.

That's six brews, and looking at my diary for the next couple of months, I can see I might get two done in September, definitely two in October and the rest in November. I need to learn patience and maybe become like this wise old bull.

Tuesday 17 August 2010

Latest Brew - Summertime


I'm very pleased to have got this recipe in the cornie at long last. I've been having a bit of trouble with a couple of infected brews and was anxious (and for "anxious" read bricking it) that this pale ale would be similarly afflicted.

I need not have worried; it's not as nice as the Green Bullet single hop beer but it's a good starting point. I used a little Caramunich in this, too little really but the Cascade/Chinook aroma hops come through. It is quite crisp but a little thin.

The original recipe was

4500g MO
240g Torrefied Wheat
100g Caramunch

28g Northern Brewer (90 min AA 8.5%)
23g Cascade (25min 7.6%)
8gm Cascade (5min)
20gm Chinook (0 min)

After consulting with those who know far more about brewing than I, the next incarnation of this beer will have another kilo of pale malt and 500g more Caramunich. The hop schedule will also be radically altered with a lot more late hops going in.

The trouble is, though, by the time I get round to brewing it, we will probably be in November by which time a summer pale ale might seem incongruous.


Monday 16 August 2010

(Green) Bullets to Wellington

So I got an email the other day from Evin O'Riordain from The Kernel Brewery, fast becoming (rightly) recognised as one of the finest craft brewers in the British Isles, telling me he'd had a visit from "a fellow in the NZ beer scene" who was looking for beers single hopped using only New Zealand hops.

He then went on to tell me that, as he had "not a single bottle" of the Nelson Sauvin single hopped ale that the Kernel was famed for (it's not one that I've had the pleasure of tasting either). Evin went on to tell me that, "as I couldn't let him leave empty handed" he gave him a bottle of my single hopped Green Bullet IPA.

Blimey.

He went on to tell me that the beer will be tasted at the Beervana NZ event organised by the NZ brewers guild:http://brewersguild.org.nz/beervana2010. Not so much coals to Newcastle as Bullets to Wellington.

It is fair to say that by this time I was bricking it. I mean, the Green Bullet was only my fifth all grain brew and here was Evin sending it half the way round the world. There I was thinking about the steps one would take to avoid drinking my beer (and sending it to New Zealand is an absolute masterstroke) when I received a second email from Evin reviewing the second bottle I'd sent him. I was pleased to read "Not hugely aromatic, but beautifully clean and had a great bitterness, Lovely Beer" I don't think they'll be flying me over to New Zealand as a brewing consultant just yet but it was a much appreciated comment from a lovely bloke who really does know his beer.

Tuesday 20 July 2010

Brewing Update


I brewed my sixth all grain beer last weekend. It's been a bit of a rollercoaster; I've brewed the best and worst brews ever on consecutive weekends.

The worst was an attempt at Brentwood Best which I think, suffered from a blip in my cleaning regimen. It didn't taste infected but it certainly tasted rank and it has been suggested to me that I may have failed to adequately rinse out the cleaner/sanitiser.

The best was a pale ale single hop beer for which I used Green Bullet at 90mins, 30 mins and flame out, 90% pale malt with 5% crystal and 5% torrefied wheat. Amazingly it was drinkable at 7 days in the bottle but at a month it is a crisp, thirst quenching pale bitter. There is a hint of aroma that doesn't actually encourage me to take a sip but, other than that, I'm well happy.

Last weekend I also put the finishing touches to my bar, I've eschewed my King Kegs in favour of four cornelius kegs, a chiller, three tap T-bar and a beer engine. Obviously I have a lot to learn about the set up (like not to leave the gas on for a start!) but it's a start and I hope to have four drinkable beers in there in a couple of weeks' time.

Monday 31 May 2010

Beer Porn - My First All Grain Pint. Amarillo Pale Ale


For my first effort I wanted to keep things simple and recipes don't get simpler than this:

4kg Pale Malt
200g Torrefied Wheat (for head retention)
45g Amarillo @ 90mins
35g Amarillo @ 10 mins
15g Amarillo @ 0 mins

I'd like to say that the recipe was mine but it wasn't and need to thank Drew the Brew from the Brew it Yourself forum for it.


Sunday 30 May 2010

All Quiet on the Blogging Front

Things have been a bit quiet on the blogging front for a couple of weeks; mainly due to my birthday party last week but also due to work, the onset of the cricket season and a number of other pressing engagements.

The most recent of these was a visit to the Rough Old Wife cidery in Old Wives Lees just outside Canterbury. They make their cider the traditional way with a long slow fermentation in old whisky barrels which certainly leaves its stamp on the cider.

I've never been the greatest fan of cider but what I drank yesterday, including Blushing Old Wife made with 10% raspberries was fantastic. It has certainly given me ideas for what to do with my demijons in the winter.

Tomorrow I'll be starting my third all grain brew, a beer in the style of Brentwood Brewing Company's Best Bitter. I've now moved the brewery permanently into the shed and bought a small pump to transfer the sweet wort from the collecting vessel back up to the boiler. While it is mashing and boiling away I'll also be bottling my Black Rock Cider (made from a kit) and my "Gone for a Burton" which should both be ready in time for my brother in law's birthday in three weeks time (I made an 35 litre batch, of which about 27 litres were kegged last week and the rest racked and further dry hopped for bottling tomorrow). All of this is good news as my kegs and bottles took rather a hammering at last week's party; two (admittedly already half empty) kegs and a good 60 bottles went which I take as a sign that my beer wasn't all that bad.

In the meantime I'll be knocking up another summer ale recipe using Northern Brewer as a bittering hop and Cascade for the flavour (no prizes for guessing where I got that idea from). Hopefully I'll post a couple of pictures of the new brewing in action tomorrow.

Sunday 16 May 2010

An "As live" Brewday

This posting appeared on Facebook but for those who don't have access to that social media and would like to read my wibblings here please see below.

0810 Hot Liquor Tank on, before and of you fnarr fnarr about me having a hot licker in the shed, a Hot Liquor Tank is a posh name for a boiler, in brewspeak, liquor = water. Make the tea.

0820 While water is warming up, the shed needs to be cleared out so that both I and my brewery can both fit in there.
It's a bit tight in the brewing shed.


0830 Weigh out the grains; in this case 8.10 KG of Pale Malt (Maris Otter) and 840g of Crystal Malt.

0900 Temp of water up to 80C, run off a couple of litres to pre heat the Mash Tun

0910 23 Litres of Liquor at 77C and then "dough in" the grains, make sure the mash temperature hits 66C (which it does) and then cover it up and set the timer for 90 minutes.
"Doughing in"


0930 Hang the washing out. There's a lot of downtime in All Grain brewing as Russ Pope with tell you so it never hurts to earn those brownie points from the other half. During this time I'm also going to attempt to sterilise some bottles and a keg in preparation for kegging/bottling last week's brews.

1010 Weigh out items for the boil. 40g Northern Brewer, 40g East Kent Goldings, 840g Golden Cane Sugar (all for the 90 min boil) 20g Fuggles and a protofloc tab for the last 2 mins.

1040 Drain and recirculate the first few litres of sweet wort then, when it runs clear, collect it in a fermenter (or bucket). Top up with 15 litres of water at 75C then leave for 10 mins. Prepare the last 18L of water for the second batch sparge.

1200 Put collected wort back into the boiler and switch the elements on. I've collected just over 10 gallons which was slightly less than I needed which will mean the beer is a little bit stronger than I will originally have planned.

1300 Rolling boil achieved added the sugar, Northern Brewer and East Kent Goldings. Pop round to the neighbours with the spent grain for their chickens and return with half a dozen freshly laid eggs. Apparently the last lot of grain has caused the yolks to be even yellower. Woohoo.
Lots of hoppy goodness


1428 The late hops for aroma and protofloc to help prevent chill haze when the brew is bottled.

1430 Chillers in; this helps to cool the wort quickly to pitching temperature which helps prevent bacterial infection. Rehydrating yeast in some cooled boiled water
OG spot on. This may be a strong one. I think I'll call it "Gone for a Burton"
This takes about 40 mins so I've got time to bottle my last (but probably not last ever) kit brew. This one is one of what is known on Jims Beer Kit as an Out of Date Brewbuddy experiment. My good friend and fellow brewer James Wilson got his mitts on some out of date Youngs Brewbuddy kits from a supplier. I've taken five of them and am applying identical (kit) brewing techniques with different ingredients.

With this one I brewed with 1kg of Beer Kit Enhancer, a hopped tea made with 15g Nelson Sauvin hop pellets courtesy of Gadds of Ramsgate followed by a dry hop with the remaining 28g. My brewing colleague Philip Bird has also done such experiments and between us we have East Kent Goldings, Pacific Gem, First Gold and Nelson Sauvin versions. I've used S04 yeast with mine but not sure what Phil used with his. I've got an Amarillo version to do and probably a Fuggles one as well (but this time with Windsor yeast).


1530 Running the wort into the fermenters from a height to achieve good aeration. Because this brew is to 35L I'll need two fermenters. I've taken the OG which, adjusted for temperature, comes out exactly at 1067 which was the target OG.
Lovely clear wort


1600 Pop off to Tescos to do a bit of shopping, come back and split the yeast into the fermenters using a sterilised 60ml syringe.

1630 Fermenters in the brewfridge at 20C and time to clean up. Actually I had other things to do at this time so the cleaning up has still to be done.

I'm pretty pleased with my second all grain effort and I'll be going another brew in a couple of weeks time when I've had the opportunity to empty some kegs and some bottles.

For other pics please see the thread on the Brew it Yourself forum