
I was going to write a "how to" construct an all grain brewery but I'm so incredibly retarded at DIY that my attempts should probably be referred to as a "how not to". However the testing has been completed and I'll be popping my AG cherry on Saturday, weather permitting.
It all seemed so simple when I started out a few weeks ago bit of plumbing here, bit of drilling there, butcher a couple of kettles and bob's your uncle.
Why go for a 10 Gallon set up?
It was pretty simple really, my kegs are all 23/25L capacity and I'd like to do some bottling as well so why half fill a keg. The plan is to bottle 15 or 20 x 500ml bottles and fill a keg, once I've got the hang of it, that is.
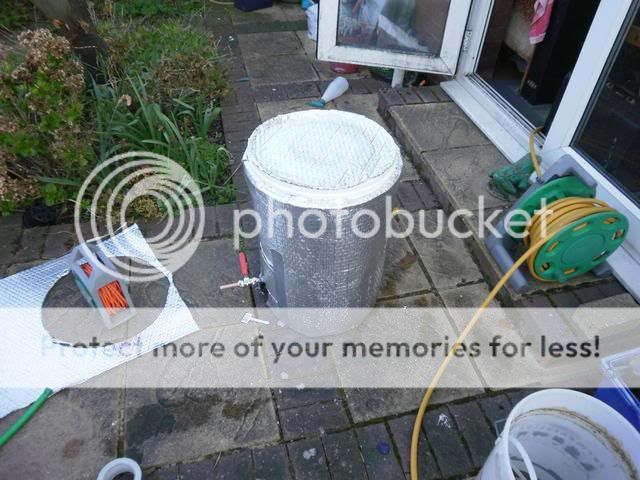
And then the trouble started. First of all I had to find something to drill holes in the side for the kettle elements, I settled on a 38mm hole saw. The outside of the hole looked perfect but there were a lot of rough edges on the inside. I filed them down as best I could but they both leaked, not a lot, but they leaked.
At the weekend I tried top have a boil up and still had a small leak in element 1 but, worse still, the boiler wouldn't heat up. I went back to the drawing board and realised I'd forgotten to link the wires on the element to complete the circuit. I can build a computer from scratch but give me some simple household electrics and plumbing and I'm a gibbering wreck. In the end, the right amount of food grade sealant (i.e. lots) seemed to do the trick.
Last night I tested the boil and no leaks. It is hard to describe the feeling but I think the only way to describe it that is a bit like being a kid the night before Christmas crossed with a dog who's just discovered he can lick his own balls.
I'll post some pix of my first brew at the weekend, assuming it's not a complete balls up and I'll include the hop strainer which was the only thing that went right first time. Remember, if someone as hopeless as I can build a brewery there's hope for us all.


Does that hop filter fit into the gulley at the bottom? I'd be interested to hear how it performs - might make one like that myself with my legendary DIY skills - haha!
ReplyDeleteActually that's the mash tun, but Phil did the same thing on his HLT I think. It's just a bit of braided hose with the insides stripped out and cable tied onto a T-piece. But, yes it does fit into the gully. I've got some stainless steel mesh I'm thinking of putting on the top of it, do you think I need it as well or am I being anal?
ReplyDeleteI always worry about the mesh braid getting squashed under the weight of grain, but it clearly works for many people. I built a copper manifold for mine (coolerbox mashtun)
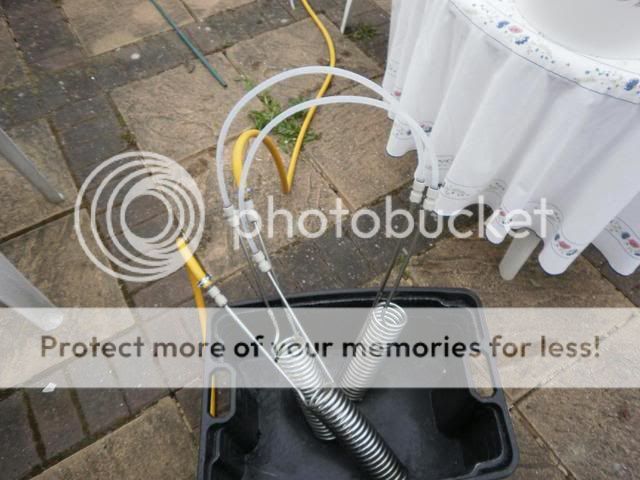
ReplyDeleteInteresting looking 3-part chiller there! :D Just an opinion, but it might not be the most efficient, as water traveling through one will heat up before it gets to the next one, so for the initial stages at least, it could be like running on one cylinder. Where did you get those coils anyway? I like shiny stuff :D
If you find it doesn't work so fast, you could build your own.
I'm going to try without on Saturday but if it proves a problem I have some SS mesh I can "false bottom" with which may help.
ReplyDeleteThe chillers came from none other than Eddie Gadd and allowed me to get the form 95 to 80 in 2 minutes and down to 30C in a further 15 minutes using only 15 Gal of water which I was pretty pleased about. It did occur to me that I could have plumbed them in parallel but I couldn't be bothered. I'm well pleased with the performance.
Not bad so! :D Mine goes from boiling to 25°C in about 20-30 mins, depending on the time of year. Really have to think about a different method that uses less water though.
ReplyDeleteThe other option would be to have a small pump pumping water from one water butt to the other though the chillers, but it's a bit fiddly for me right now.
ReplyDelete